BLOG

GOING ROUND IN OVALS

By Team Rides

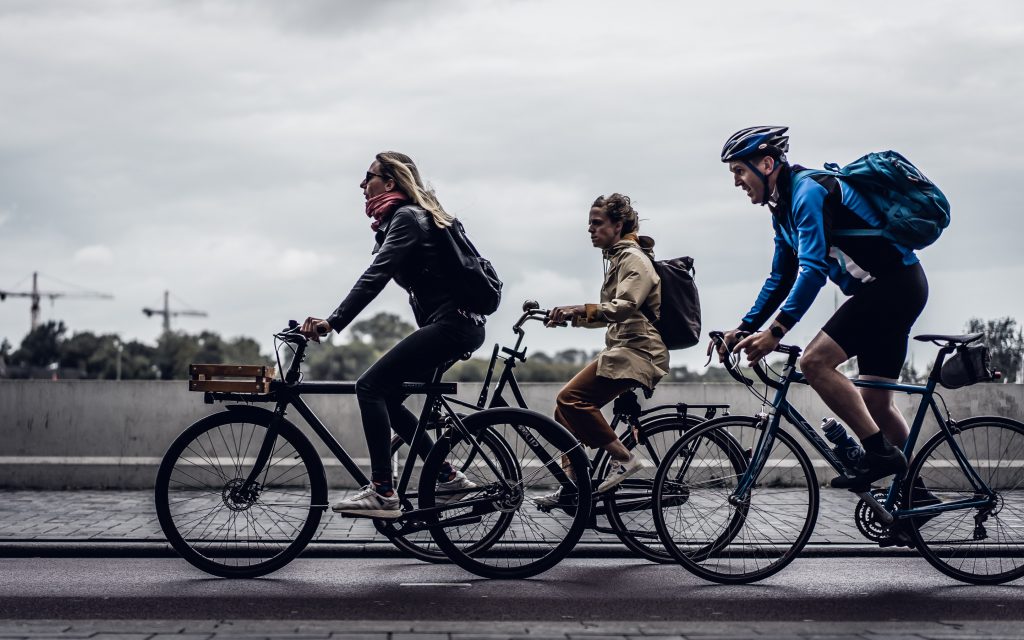
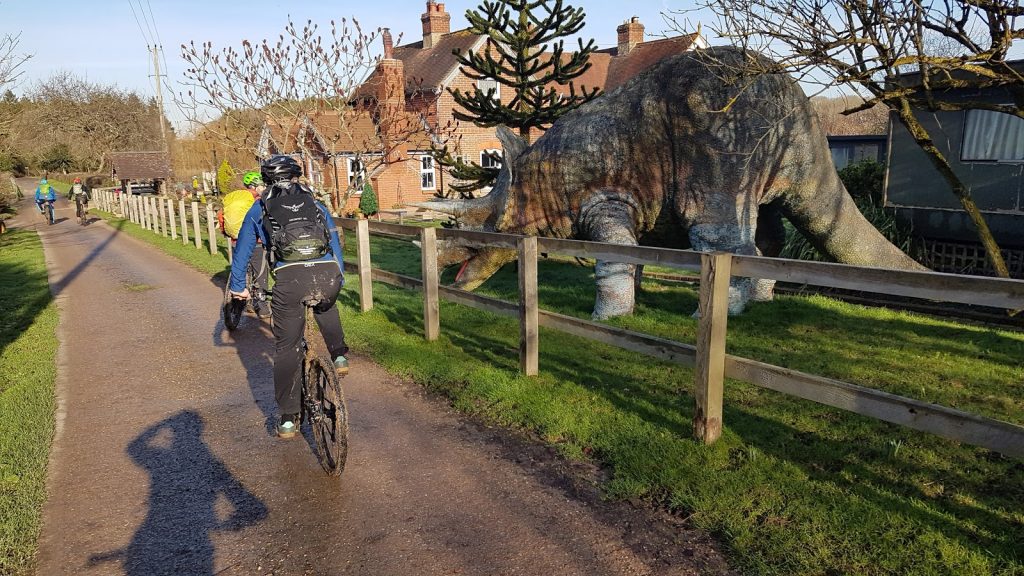
I am not a fan of a spin class, nor do I get excited about sitting on a cycle trainer watching TV, or reading a book, or even a screen with an over enthusiastic ’personal trainer’ telling  me to bring my A-game. So when I sat and thought about track cycling I wasn’t overly interested. Cycling indoors on a small track, going around and around and around on the most basic bike that has only one gear and no brakes? Well, the thought of it just didn’t motivate me.

Then by some strange coincidence my daughters bought me a Velodrome experience. How wonderful. Actually, my curiosity was already raised. What is the draw, and why is it so popular. Why not, I thought, it’s a form of cycling I haven’t tried so I need to give it a go before fully writing it off.

It was a sunny Saturday in June. We headed off to Lee Vally VeloPark and to the velodrome. An impressive building, which was equally impressive once I was in and waiting at the side of the track for my turn to do a few loops of the Olympic velodrome.

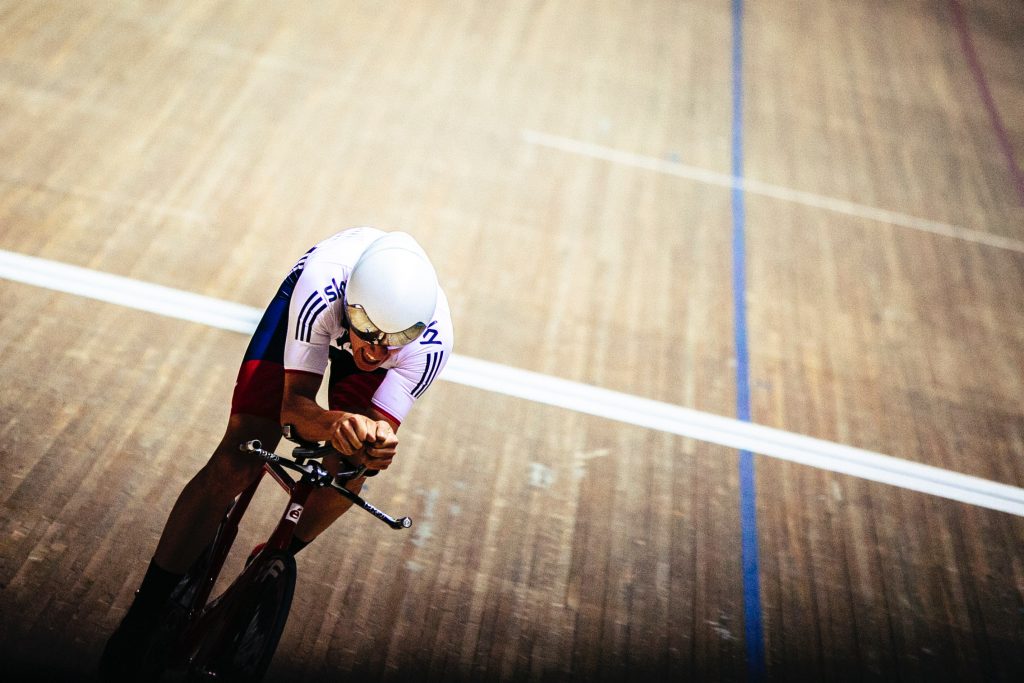
And pause… Olympic. This velodrome held the cycling events in the 2012 Olympic Games. I was about to ride in the wheel tracks of the greats such as Sir Chris Hoy, Victoria Pendleton, Laura Kenny, and Jason Kenny. All of which won Gold for Great Britain. These wooden boards had seen on track battles that had resulted in Britain winning a significant number of medals. It’s not a difficult calculation, but 10 years on you can ‘feel’ the memories. Like the excitement still echoes around the Velodrome. Probably helped by an exhibition of the history and build up to the Olympics, and the actual medals won by the British Cycling Team (although I’m sure they were copies, surely).

And then it was my time. There was a strange feeling of excitement and anxiety as I walked along the tunnel that delivered me into the middle of the track. Shoes on, gloves on, bike fitted to me, and I was ready to go alongside my comrades. We listened intently to our coach as he gave us the basic instructions. Must remember fixed gear, don’t stop peddling – that was the easy bit as I ride a fixie around Canterbury that I built up, when the urge takes me. No brakes – that’s the slightly more difficult bit.

A few laps on the flat blue bit (known as the apron) to familiarise ourselves with the bike and then we were up on the wood. First to the pale blue Cote d’Azur to get up to speed, then up to the black line – the datum line, or the shortest line around the 250m track. Here we had a few laps at pace. Then it was up to the red line, also know as the sprinters line where the angles are serious. 45 degree banking on the corners become a little daunting and encourage you to push a bit harder to build momentum for the corners. Next, we moved above the blue line and circled the track above this line so that we were right up skimming the wall. It’s a long way up there, it looks a long way down, and it’s tough going too. Four times the power needed to circle near the wall than on the black racing line, and it felt it. After a few laps it was time to take a break, thankfully. I was surprised at the level of effort needed to maintain a good pace, particularly as you climbed up the banking. Which was a skill that needed to be mastered for the flying lap.

Ah, yes. The flying lap. Part of the experience was a timed flying lap. Timed, on the very oval that Sir Chris Hoy and Victoria Pendleton won gold (did I mention that already?). All of a sudden thoughts were to best line, best approach angle. How to maintain momentum. We would have one lap to start low, then build speed and climb the banking before pushing hard around the bottom bend to drop in as the oval straightened to give us the maximum attack speed for the lap. As we crossed the start line we should be at maximum speed low on the circuit, and then it was just a case of keeping the bike on the blue line and the legs pumping for one revolution of the track.

And it was exhilarating. With the determination level cranked up to 11 (tenuous link) I strategised and planned my line. A good build up. A high line at the bottom corner. A burst of power as I dropped down the banking to start the lap and then the longest 18 seconds ever experienced. It’s only two corners but by the time I hit the back straight I was breathing hard. Coming round the final bend and onto the straight the anaerobic energy in my legs was spent and they started shaking making it difficult to push the last few metres.

What a rush. Second quickest time of the day, and a massive sense of achievement. Not just the time, but the experience. My first track session. Without any doubt I can recommend the experience to anyone who enjoys cycling regularly. Particularly anyone who likes to road cycle. It’s another level. 

Big thanks to the team at Lee Valley VeloPark were great, helpful, knowledgeable and enthusiastic.

THE HIGHWAY CODE – RULES FOR CYCLISTS

By Technical

Did you know that within the Highway Code there is a section that consists of 23 rules that are specific to cyclists, and cycling? Have you ever read the Highway Code? Do you even know what The Highway Code is?

Honesty time… I haven’t read it since studying for my driving test which was more than a few years ago. So I thought I’d review it, and bring you the important information for those of us who prefer two wheels over four.  The Highway Code is a set of information, advice, guides and mandatory rules for road users in the United Kingdom. Its objective is to promote road safety and applies to all road users including pedestrians, horse riders, motorcyclists and vehicle drivers, as well as cyclists.

The below is copied directly from The Highway Code which you can read in full here. Just an important word on the terminology used; MUST and MUST NOT is used where it is a legal requirement, and the specific law is referenced. SHOULD is used where it is guidance or a recommendation.

1. Overview (59 to 71)

59

Clothing. You should wear

  • a cycle helmet which conforms to current regulations, is the correct size and securely fastened
  • appropriate clothes for cycling. Avoid clothes which may get tangled in the chain, or in a wheel or may obscure your lights
  • light-coloured or fluorescent clothing which helps other road users to see you in daylight and poor light
  • reflective clothing and/or accessories (belt, arm or ankle bands) in the dark.

Rule 59: Help yourself to be seen

60
At night your cycle MUST have white front and red rear lights lit. It MUST also be fitted with a red rear reflector (and amber pedal reflectors, if manufactured after 1/10/85). White front reflectors and spoke reflectors will also help you to be seen. Flashing lights are permitted but it is recommended that cyclists who are riding in areas without street lighting use a steady front lamp.
Law RVLR regs 13, 18 & 24

61
Cycle Routes and Other Facilities. Use cycle routes, advanced stop lines, cycle boxes and toucan crossings unless at the time it is unsafe to do so. Use of these facilities is not compulsory and will depend on your experience and skills, but they can make your journey safer.

62
Cycle Tracks. These are normally located away from the road, but may occasionally be found alongside footpaths or pavements. Cyclists and pedestrians may be segregated or they may share the same space (unsegregated). When using segregated tracks you MUST keep to the side intended for cyclists as the pedestrian side remains a pavement or footpath. Take care when passing pedestrians, especially children, older or disabled people, and allow them plenty of room. Always be prepared to slow down and stop if necessary. Take care near road junctions as you may have difficulty seeing other road users, who might not notice you.
Law HA 1835 sect 72

63
Cycle Lanes. These are marked by a white line (which may be broken) along the carriageway (see Rule 140). Keep within the lane when practicable. When leaving a cycle lane check before pulling out that it is safe to do so and signal your intention clearly to other road users. Use of cycle lanes is not compulsory and will depend on your experience and skills, but they can make your journey safer.

64
You MUST NOT cycle on a pavement.
Laws HA 1835 sect 72 & R(S)A 1984, sect 129

65
Bus Lanes. Most bus lanes may be used by cyclists as indicated on signs. Watch out for people getting on or off a bus. Be very careful when overtaking a bus or leaving a bus lane as you will be entering a busier traffic flow. Do not pass between the kerb and a bus when it is at a stop.

66
You should

  • keep both hands on the handlebars except when signalling or changing gear
  • keep both feet on the pedals
  • never ride more than two abreast, and ride in single file on narrow or busy roads and when riding round bends
  • not ride close behind another vehicle
  • not carry anything which will affect your balance or may get tangled up with your wheels or chain
  • be considerate of other road users, particularly blind and partially sighted pedestrians. Let them know you are there when necessary, for example, by ringing your bell if you have one. It is recommended that a bell be fitted.

67
You should

  • look all around before moving away from the kerb, turning or manoeuvring, to make sure it is safe to do so. Give a clear signal to show other road users what you intend to do.
  • look well ahead for obstructions in the road, such as drains, pot-holes and parked vehicles so that you do not have to swerve suddenly to avoid them. Leave plenty of room when passing parked vehicles and watch out for doors being opened or pedestrians stepping into your path
  • be aware of traffic coming up behind you
  • take extra care near road humps, narrowings and other traffic calming features
  • take care when overtaking

68
You MUST NOT

  • carry a passenger unless your cycle has been built or adapted to carry one
  • hold onto a moving vehicle or trailer
  • ride in a dangerous, careless or inconsiderate manner
  • ride when under the influence of drink or drugs, including medicine.

Law RTA 1988 sects 24, 26, 28, 29 & 30 as amended by RTA 1991

69
You MUST obey all traffic signs and traffic light signals.
Laws RTA 1988 sect 36 & TSRGD reg 10(1)

70
When parking your cycle

  • find a conspicuous location where it can be seen by passers-by
  • use cycle stands or other cycle parking facilities wherever possible
  • do not leave it where it would cause an obstruction or hazard to other road users
  • secure it well so that it will not fall over and become an obstruction or hazard.

71
You MUST NOT cross the stop line when the traffic lights are red. Some junctions have an advanced stop line to enable you to wait and position yourself ahead of other traffic.
Laws RTA 1988 sect 36 & TSRGD regs 10 & 36(1)

2. Road junctions (72 to 75)

72
On the left. When approaching a junction on the left, watch out for vehicles turning in front of you, out of or into the side road. Just before you turn, check for undertaking cyclists or motorcyclists. Do not ride on the inside of vehicles signalling or slowing down to turn left.

73
Pay particular attention to long vehicles which need a lot of room to manoeuvre at corners. Be aware that drivers may not see you. They may have to move over to the right before turning left. Wait until they have completed the manoeuvre because the rear wheels come very close to the kerb while turning. Do not be tempted to ride in the space between them and the kerb.

74
On the right. If you are turning right, check the traffic to ensure it is safe, then signal and move to the centre of the road. Wait until there is a safe gap in the oncoming traffic and give a final look before completing the turn. It may be safer to wait on the left until there is a safe gap or to dismount and push your cycle across the road.

75
Dual carriageways. Remember that traffic on most dual carriageways moves quickly. When crossing wait for a safe gap and cross each carriageway in turn. Take extra care when crossing slip roads.

3. Roundabouts (76 to 78)

76
Full details about the correct procedure at roundabouts are contained in (see Rules 184 to 190). Roundabouts can be hazardous and should be approached with care.

77
You may feel safer walking your cycle round on the pavement or verge. If you decide to ride round keeping to the left-hand lane you should

  • be aware that drivers may not easily see you
  • take extra care when cycling across exits. You may need to signal right to show you are not leaving the roundabout
  • watch out for vehicles crossing your path to leave or join the roundabout.


Rule 185: Follow the correct procedure at roundabouts


78
Give plenty of room to long vehicles on the roundabout as they need more space to manoeuvre. Do not ride in the space they need to get round the roundabout. It may be safer to wait until they have cleared the roundabout.


4. Crossing the road (79 to 82)

79
Do not ride across equestrian crossings, as they are for horse riders only. Do not ride across a pelican, puffin or zebra crossing. Dismount and wheel your cycle across.

80
Toucan crossings. These are light-controlled crossings which allow cyclists and pedestrians to share crossing space and cross at the same time. They are push-button operated. Pedestrians and cyclists will see the green signal together. Cyclists are permitted to ride across.

81
Cycle-only crossings. Cycle tracks on opposite sides of the road may be linked by signalled crossings. You may ride across but you MUST NOT cross until the green cycle symbol is showing.
Law TSRGD regs 33(2) & 36(1)

82
Level crossings/Tramways. Take extra care when crossing the tracks. You should dismount at level crossings where a ‘cyclist dismount’ sign is displayed.


Annex 1 – You and your bicycle

Make sure that you feel confident of your ability to ride safely on the road. Be sure that

  • you choose the right size and type of cycle for comfort and safety
  • lights and reflectors are kept clean and in good working order
  • tyres are in good condition and inflated to the pressure shown on the tyre
  • gears are working correctly
  • the chain is properly adjusted and oiled
  • the saddle and handlebars are adjusted to the correct height.

It is recommended that you fit a bell to your cycle.

You MUST

  • ensure your brakes are efficient
  • at night, use lit front and rear lights and have a red rear reflector.

Laws PCUR regs 6 & 10 & RVLR reg 18

So there we have it… the sections of The Highway Code that apply to cycling and cyclists.  Here at The Canterbury Bike Project we are aware that cycle training can help both children and adults increase their confidence in bike control and hence their safety on the road, especially those adults returning to cycling. It is important to develop the skills needed to cycle safely on today’s busy roads, or to be able to plan a route which takes you on dedicated cycle routes or roads with less traffic.

All cyclists should consider the benefits of undertaking cycle training. For information or if you have any questions, contact us…

BICYCLE CURIOUS

By Project News

Olivia, daughter of The Canterbury Bike Project volunteer Michael, discovers what the project is about… 

The Canterbury Bike Project is something I have been aware of for a while now, as my stepdad Mike spends a lot of time there. If he’s not at home, he’s usually at The Canterbury Bike Project, and I have wondered for a while now what it is he can be doing there that takes up so much of his time. When Mike asked if I wanted to go along with him to the project, though I know very little about bikes at all, I was rather curious to see what it was all about.

Other than that the fact that The Canterbury Bike Project was to do with bikes, I didn’t really know much about what they do; I’d heard Mike talking about it a lot, but I wasn’t aware for example that they work with students or that they do free workshop sessions for members of the local community.

It was a Friday morning, and the lure of a Starbucks coffee made me say yes to accompanying Mike to the project. While we were there I got my hands dirty and helped work on a bike that was to be repaired for a customer. When I first looked at the bike, I honestly wondered what it was that needed changing; to me this looked like any other bike, not a broken one.

However I soon learnt about ‘maintenance’. One of the tasks I helped with was changing the brake cables on the bike as they had become corroded and were becoming a safety issue.  It sounds simple enough to replace a couple of cables, but there are so many little steps and parts to consider, such as what goes where and in what order. With many different parts that affect the cables and connect it to the lever and the brakes themselves, it is impressive to me how anyone can remember it all.

What I didn’t realize before was how much focus is required when repairing bikes; I had to really pay attention to ensure that everything I was doing was correct. It took me over an hour just to change a couple of cables, the chain, and the rear cogs on the bike, and then Mike went on to make the gears work correctly.  There were a huge variety of tools needed too, including a torque wrench that had many different settings and socket sizes which is matched to the size of the bolt. Amazingly, the team seemed to know these sizes instantly.

When I used to think about Mike going The Canterbury Bike Project, I thought of it as him just playing around with some bikes, but now that I have been there I have seen how much more engaging it is, and all the hard work that goes into everything they do. So much time and so many tools were needed for the repair we did and this was actually a pretty basic repair. The complexity of even the small repairs and changes was surprising to me, and I wasn’t aware just how connected all the parts of a bike are. They all have to work together.

As the goals of The Canterbury Bike Project don’t revolve around money, and because of their passion, I would trust them to do a great job with my bike and to offer fair prices. The fact that they don’t charge for their time for repairs, and host workshop lessons for free seems to me to show that their true aim is only to share their knowledge. They do everything to the best of their ability to keep the bikes they see safe for it’s owner. I think that a big part of The Canterbury Bike Project is that it is a very friendly space, all of the team members are there because they want to be, most are volunteers and are passionate about the project. Something that I think is evident in the hard work and many hours they put in and the kind atmosphere. Now I know why Mike spends a lot of his spare time there!

THE JOLLY BOYS OUTING, PART 1

By Team Rides

Like a bunch of school kids packed into the school bus heading away on a school trip, away from their parents for the first time, nervously excited of what the next two days would bring. That’s how the male contingent of the Canterbury Bike Project team felt as they crossed the Severn bridge into Wales on route to an intensive two day training session with Windy of WyeMTB who would be preparing us for our British Cycling Ride Leadership Level 2 award.

To be able to engage more of the local community and support individuals in their riding development we as a team want to take small groups out on organised local rides. To do this professionally, safely, and with all the necessary insurances and approvals we needed to complete training, and assessment in line with British Cycling Ride Leadership courses. The Level 2 course gives any ride leader the skills to safely take a team of up to 8 riders out on a planned off-road semi remote route. That means MTB fun to you and I.

Arriving late at our hotel, we all couldn’t sleep with excitement so kept the bar tender company until he closed the bar.  The following morning a healthy breakfast was had knowing we had quite a few miles of riding ahead of us.

With the nerves rising, we met Windy – nothing to do with the beer or the breakfast, but Dave Windebank from WyeMTB. Top bloke! We were soon chatting about bikes (obviously) and sharing war stories.  The morning consisted of a classroom session, cementing the feeling that we were kids back at school withnervous excitement.  The British Cycling Ride Leadership Award enables those qualified to lead rides in more remote environments and over longer and more challenging terrain. The award qualifies leaders to deliver guided bike rides safely for groups of intermediate and advanced level adults. Throughout the morning we covered topics such as planning and delivery of rides, leading techniques for effective group management, map reading and navigation, management of accidents and emergencies, equipment set-up, trailside repairs and core mountain bike techniques, decision making and advanced risk management.

Then there was the ‘practical’ element, which included a timed ‘test’ to see how quickly we could remove a wheel, remove the inner tube, swing it around our heads, and then re-assemble.  With Steve doing this activity many times daily at the bike project (replacing inner tubes, not swinging them round his head) he won, obviously.

After a spot of lunch, and yet more stories of the biking kind, and appreciation for the mechanical offerings to the biking gods that we had brought along for the weekend (our bikes…), we headed out for a ‘quick’ afternoon ride. To be fair to Windy it was a relatively short ride for the afternoon, but he threw some crazy climbs at us.  I for one had to dig deep, get into my zone, and pound away to keep the momentum up – mainly as my bike was not geared for such climbs.  Then there was the ‘baby skulls’ climb – large, wet, slippery cobbles on a climb that would have been a challenge with out them. Only the instructor, Windy, made the climb. Just a bit of showing us who’s boss I think…

With day one over, we were set some homework. To plan the route and guidance notes for the following day, where we would take it in turn to lead a section of the ride.  Luckily for us the bar was warm and inviting. A couple beers in and the mind was lubricated well enough to quickly get the route planned.

The following morning we woke, had breakfast, and headed to the meeting point for day 2 of our training.  Let’s revisit breakfast for a second.  The team decided to run a small fuelling experiment. Two of us went for the full-english fry up, whilst the other two of us took the continental (read healthy) route. The fry up was huge!! Two of everything. Certainly a lot of calories were piled in. The continental, complete with porridge, orange juice, and yoghurt was light on the stomach, but were there enough calories to carry us through the day?

At the meeting point, we kitted up, readied the bikes and headed out on our longer ride of the weekend. This time The Canterbury Bike Project team were in control… mostly.  We took it in turns to lead the team through the Wye Valley along the route we had planned the previous night.  Surprisingly, all went well. We had opted not to use electronic GPS guidance and to rely on the lessons from the day before, and a good old fashioned paper map (although the paper was the special water proof kind).  Now, to give a little detail here, there is a number of procedures, and checklists that need a British Cycling ride leader needs to go through (albeit somewhat informal) before leading a group out on the ride. Then on the road, a continuous adaptive risk assessment is carried out by the ride leader to ensure the group is safe, the route remains suitable, and the return time remains achievable. Part of the planning of a route requires alternative routes to be planned in case the ride distance needs to be changed to suit the group. So to say all went well means everyone successfully led their section of the route and took on the guidance from Windy on how to improve the experience for our future customers. A good day, a good ride in awesome surroundings, and a good experience with Windy from WyeMtb.

In the van on the way back to Canterbury we were all a little drained from the long weekend, but we also excited and motivated to complete our training, which was to include a number of planned and led rides over the coming months, complete with planning and risk assessment evidenced in our logbook on which we were to be assessed.  We were so motivated that we managed to squeeze a quick stop at the pub when back in Canterbury, just so we could continue planning the dates and rides that we needed to complete…

A huge thank you and a mighty recommendation to the team at WyeMtb for taking us through the British Cycling Ride Leadership course.  Established in 2010 by two passionate mountain bikers, WyeMtb’s objectives are to educate, encourage, and enhance Mountain Bike participation in and around the Wye Valley, Forest of Deam, and South Wales, by offering expert mountain bike coaching and guided rides. They run some great courses in an enviable location. Definitely look them up…

So that was the training. What about the assessment? Keep an eye out for Part 2 coming soon where The Canterbury Bike Project team tackle examination day!

CLEANLINESS IS NEXT TO…

By Technical

I’m going to talk about the very basics of looking after a bike.

We’re not talking anything fancy here. No special knowledge or tools are needed. It’s not something that needs to be taught and practiced…

I’ll get straight to the point just to show you how basic we are talking.

  • Keep your bike clean. Not ‘from the shop’ clean, but wash most of the mud off it after use, and dry it before you put it away.
  • When not in use protect it from the weather. If you can, store your bike in a garage or shed. If you have to keep it outside in a garden put a tarpaulin over it to protect it.

Those two points will greatly increase the life of your bike, the parts on your bike, and reduce the need for repairs. Simple.

a bearing that is way beyond replacement. The ball bearings are worn down and have flat edges.

Why just these two points? Well to answer that we have to go into a little more detail.

Firstly, moving parts do not like dust and dirt. A chain for example should be clean and ‘lightly’ oiled on the rings only – the bits that engage with the cogs.  Oil will collect dust and dirt – fact. The more oil on the chain, the more dust and dirt it will soak up. The oil mixes with the dust and dirt to become a grinding paste. So if left alone for too long your chain and cogs (rear cassette and front chainrings) wear themselves away with every peddle stroke. 

Wipe down the chain with a cloth to remove excess oil and dirt, a little degreaser sprayed on the cloth can help (Never spray degreaser or oil directly towards the chain incase it gets on the braking surfaces). Then apply a little fresh oil to the middle of the chain and your chain will reward you with a longer life.  Similarly headset and bottom bracket bearings should be kept clean to reduce the chance of dirt getting in and accelerating the wear.  When we service a bike, we routinely remove, clean, grease, and reinstall the bottom bracket and headset bearings to save you the cost of replacement in the long run.

Emulsified grease and water in the bearings seen here

Then there’s the mud. Mud holds water and takes a long time to dry out, and so when in contact with metal the moisture in the mud supports the formation of corrosion, rust typically, which isn’t good whichever way you look at it. Similarly water penetration is bad! If it gets into your headset or bottom bracket it will emulsify the grease, which means the grease will stop protecting the bearings, and then they will corrode, and wear at a higher rate. Sticking with water ingress, if it gets in the frame, it will head south to the bottom bracket and pool around it. Until some unsuspecting mechanic breaks free the bottom bracket from the frame (usually with a lot of force due to the corrosion) and releases stagnant water that has been sitting in the frame for way too long!

A little force, water out, dried off, and this is what we are left with

Oh and there’s tyres which if left out in the sun for extended periods (read months) will crack as the rubber ‘dries out’ and becomes brittle.  Cracked tyres are dangerous and need to be replaced.

So please, even if it’s just so that the team at The Canterbury Bike Project and I don’t get covered in stagnant water so much, keep your bike clean and protect it from the weather. If you really want to look after your bike, treat it to a service every 6 to 9 months.


If you’ve found this article useful please share y clicking the share icon to the right. Thank you!

AN ISLAND ADVENTURE

By Team Rides

All the best adventures start with a sea passage. Granted these passages are usually more arduous than the Lymington to Yarmouth ferry on a crisp, bright Saturday morning in mid-January but this was our voyage and our adventure and we were brimming with excitement.

The assembled team of The Canterbury Bike Project were setting off on another of our training rides ahead of completing our British Cycling MTB Leadership Award in March. We each needed to submit a log-book of 11 two-hour and 4 four-hour rides in advance of assessment so it’s been a chance for us to spend time together and explore rides that we’ve had on our to-do lists for a while. For me, it was an opportunity to explore my childhood playground and so I spent many happy hours plotting a route that took us to some of my favourite bits and gave a real flavour of the West end of the Island.

Will, Matt, Steve, Mike and me – The Canterbury Bike Project Team

Known as one of the most expensive stretches of water in the world, we abandoned the van in the car park and embarked by foot on to the ferry and stowed the bikes before going up to the lounge to drink coffee and discuss Steve’s new adventure-bike frame that he planed to collect from The Woods Cyclery in Lyndhurst on the way home. That frame collection became a regular refrain throughout the ride and I swear it got Steve up more than one steep hill!

Plot the route digitally. Upload to the Garmin, and a printed copy as a backup.

During our training with Wye MTB it was drilled into us that a successful guided ride is one that is fun and flows, which means that even if the leader hasn’t ridden the route previously, they should know the key points and not constantly be referring to a map or GPS. Although this was my ride, the route wasn’t known to me I knew that my favourite ‘Tulip’ routing tool was going to be critical to maintaining the flow of the ride. A Tulip is a series of squares that give you the essential points of the route such as turns, waymarks and distances in between. I find I get fidgety making them as they require lots of concentration to break down a long ride into bite-size chunks, but they’re so easy to follow once you’re underway.

Before the ride there had been much debate over which bikes to bring to the Island. It wasn’t clear from the maps exactly what the terrain would be and we’d finally ended up with a mix of hardtails and short travel full suspension bikes. The first leg of the journey – The Freshwater Way – which leads over to the Southern coast of the Island proved that we’d made the right choice. As fun as gravel bikes are they’d have been uncomfortable on the broken path. Feeling righteous in our decisions, we soaked up the stunning river valley that we were cycling along. To me this lowland marsh, mud and brackish river is synonymous with home and I lapped up every minute of the journey.

Stopping to ‘relocate’ on the map as we turned left onto the road we felt that instinctive desire to follow a different route and simply explore, but we reminded ourselves that this was time to practice guiding and so we had to stick to the plan. The next stage of the journey was one of the first places we lost the route but the benefit of this being a training ride meant that we were able to collectively resolve the issue and get back on track. I was cross with my mistake but determined to learn from it when I got home. Much like the first ‘Stage’ when I’m racing, I felt nervy and unable to fully focus through this first part of the ride. By the time we’d reached the Island’s Southern coast and saw the Tennyson Trail climbing up the ridge to our left, I began to relax into my role as leader. Almost immediately I began relying on the tulip instead of my Garmin. The map on the Garmin was clear and it beaped reassuringly each time we passed a logged way point, but having not taken time to get used to it, the map wasn’t centralised on our location and I was struggling to find grid references on it.

The Western Island stretching away to the Needles behind us

The climb up the grass and chalk path of the Tennyson Trail was idyllic. With the chalk cliffs in the distance behind us, Lymington and the Beaulieu foreshore laid out to our left, the Channel sat to our right. We literally were cycling along the spine of the Island. We passed a few walkers and golfers (the Trail cuts through a golf course) and were overtaken by a couple of other MTB riders, heading on to the single-track hidden in the woods ahead. None of that bothered us as we chatted about the Project and planned future bike-packing expeditions – our plans getting ever bigger with the increasing altitude. Before long we conquered the first climb and dropped quickly down to a country lane before regaining all the lost altitude on the next hill. It made me realise how fit I am currently with training for Kingdom but also how as a Guide you are likely to be considerably fitter than many of your clients and you need to be aware of their pace and comfort as you ride. The enjoyment and reward you get from guiding is subtly different to the enjoyment of type 2 fun with your mates and with this distinction in mind it becomes easier to be conscious of the other riders in the group and their needs.

A glorious day in January

We’d planned the ride for late January, but we need not have worried about the weather – it was glorious! No wind, blue skies, strong sun – the Island was revealing itself in all it’s glory as we took our first stop about a third of the way into the ride. Basking in bright sunlight, we munched on assorted snacks before re-booting the new bike conversations to power us up the rest of the hill. Soon we were skirting along the edge of Brighstone Down, heading towards the reservoir that marked our turn North and our return to the Solent side of the island.  One of the best bits of route planning for me is the chance to pour over Ordnance Survey maps, getting lost in the history and culture of a place. Place names, old industrial works, trigonometry points, lookouts and public toilets are laid out for all to see.  I still find it amazing how many disused pits and quarries make up our countryside, while remnants of the World Wars are often left off the maps.

The Tulip I’d created used a mixture of geographical markers, distances and grid references to help keep us on the bridleways and trails that were taking us across the Island.  Not having a chance to ride the route in advance meant that I doubted myself at one turning point, marked simply with a grid reference.  A combination of apps and maps enabled us to find a suitable alternative through the woods and we were racing down the side of a field in no time, like grown up members of the Famous Five, out on an adventure. Inside I was logging the experience, determined to use it to make my preparation better next time, reminding myself that this is what practise is all about.

We followed the bridleway into a farmyard in the middle of the Island. Feeling like intruders we quickly made our way through and out the other side climbing up a root-strewn gully that was meant to be a track. Bringing out our competitive sides we tried valiantly to keep going before admitting defeat and pushing the bikes to the next field junction.

We followed the perimeter of this field to the top of the next hill and spotted the Island’s TV mast ahead, giving us a chance to pinpoint our exact location on the map. The remainder of this section of ride was surreal as we followed a rocky stream bed through land that had recently hosted shoots by the look of the buckets of spent shells along the track. Keeping an ear out for gunshots we were relieved to make it to Ashengrove in one piece.

The final third of the journey took us on a mix of lanes and National Cycle Network through Shalfleet and Newtown, the creeks where I spent most of my childhood. Honestly, I don’t think I’m happier than when I’m in this part of the Island. This is where my sense of adventure and love of freedom was cultivated and I am so lucky to still have it in my life, anchoring me and providing solace when thing get tough.

After several hours of riding through woodland and fields, we were grateful of a bit of fast tarmac pedalling to bring us back to Yarmouth and the Ferry. As we joined the main road by the groynes just outside Yarmouth we spotted the Ferry at it’s berth. With one ferry an hour and Steve desperate to get to Lyndhurst before The Woods Cyclery shut, we pedaled all out to catch this boat. Arriving at the last minute we scooted on and parked our bikes before heading up to the lounge to eat chocolate, drink tea and dissect the ride.

Love the things you find on the Island – Dino in the garden!

EPILOGUE

Steve made it to the shop in time and collected his beautiful Bombrack Beyond + frame. We all agreed that the Island is one of our favourite places to ride and we all passed our practical MTB Level 2 Leadership Award in March! Thank you to The Canterbury Bike Project for investing in me and Wye MTB for leading us through the training and assessment. I still love Tulips for guiding rides but have made good friends with my Garmin eTrex too.  I can’t wait to get more guiding and training under my belt once lockdown is over.